


This was THE most epic cake I have ever made in my entire life. I made this for my boyfriend, Matt’s birthday, because he is a zombie freak. ;)
First of all, I looked online for pictures of other zombie cakes, because I had no idea where to start. I found a few pictures I liked that were not too complicated. I decided on a sheet cake for ground with a zombie head coming out from the earth.
I then went searching for good cake recipes. I thought this Black Magic Cake sounded like a winner from Allrecipes.com, but I thought it kind of went along the theme of zombies. ;) Then I searched for a red velvet cake recipe, because of course you want the head to be red when you cut into it. I chose Red Velvet Cake.
I made the sheet cake first, because I knew it would be the easiest. It sunk. The recipe just couldn’t handle the high Utah altitude. So, if I make it again I will add more flour. I even had a feeling that it might sink before I baked, because the batter was so runny. A thicker batter and I would have been okay. It worked out though, because I was going to be digging a hole for the head anyway.
Next I went on to the red velvet cakes. I wasn’t exactly sure on how I was going to bake the head, or what I was going to bake the head in. I thought about a stainless steel bowl, but I didn’t want to buy one, because I hate them. Plus, my mom mentioned that it made not cook all the way through and I didn’t want to risk it. I came up with the idea of buying a little cake round and doing layers. As I was walking around Smith’s buying the groceries though, I came across a package of mini aluminum pie pans. PERFECT! I spent $4 for a package of 6. I greased an floured them really well to made sure they didn’t stick and then made the red velvet batter. I almost used an entire bottle of red food coloring to get it be red enough. Also a weird thing about red velvet cake, you have to combine baking soda with vinegar, so they react and bubble and then fold that into the batter. I found it really interesting, since I had never made red velvet cake before. It was something new.
I poured the batter amongst five of the pans about ¾ of the way full and put them in oven. I checked them after half the time, because I didn’t want them to overcook since they were smaller than the usual cake. They didn’t sink! They didn’t stick! They turned out great!
While the little cakes were cooling, I started on the topping for the sheet cake and the filling for the head: a Mocha Mousse recipe from Martha’s book. It was basically whipping cream with sugar, chocolate, and instant coffee. The result: AMAZINGLY DELICIOUS! My mom kept eating it, until I finally had to yell at her to stop. I put about half of this on the top of the sheet cake and then covered that with chocolate cream oreo cookies that I had run through the food processor. I had dirt! I put this in the fridge.
I then started on the Swiss Meringue Butter Cream frosting (also found in Martha's book) that I was going to use for the flesh of the zombie’s head. This recipe calls for 3 sticks of butter. Yes. I said 3. I figured if there was that much fat it had to be good right? It’s a meringue butter cream, so I start by whisking egg whites and sugar over simmering water. After 3 minutes of that I took it off the heat and kept whisking until stiff peaks formed. Which, by the way, never happened. I whisked until I could whisk no more by hand and then had to borrow an electric mixer from my mom and they still didn’t get where they needed to be. So I said screw it and added the butter. It got stiff then. I only added 2 ½ sticks before I decided that it was stiff and fattening enough. I probably could have stopped at 2 though. So now I had my flesh, so I needed to start building the head.
By this time, the little red cakes were cool, so I cut them in half. I started stacking them by putting the mocha mousse in between each cake layer. I got to about three when my stack started sliding, and all the mousse was oozing out the sides. I took the stack apart and scraped off the mousse. I started again, but this time, I piped a dam of butter cream around the edges before filling with the mousse. This time it worked. Before moving the stacked cake layers over my mom dug a hole in the “dirt” sheet cake. Then she moved the layers over and I stuck 4 dowels all the way through the layers down to the pan of the sheet cake. That sucker was not going to go anywhere, which is what I needed for my trip to SLC.
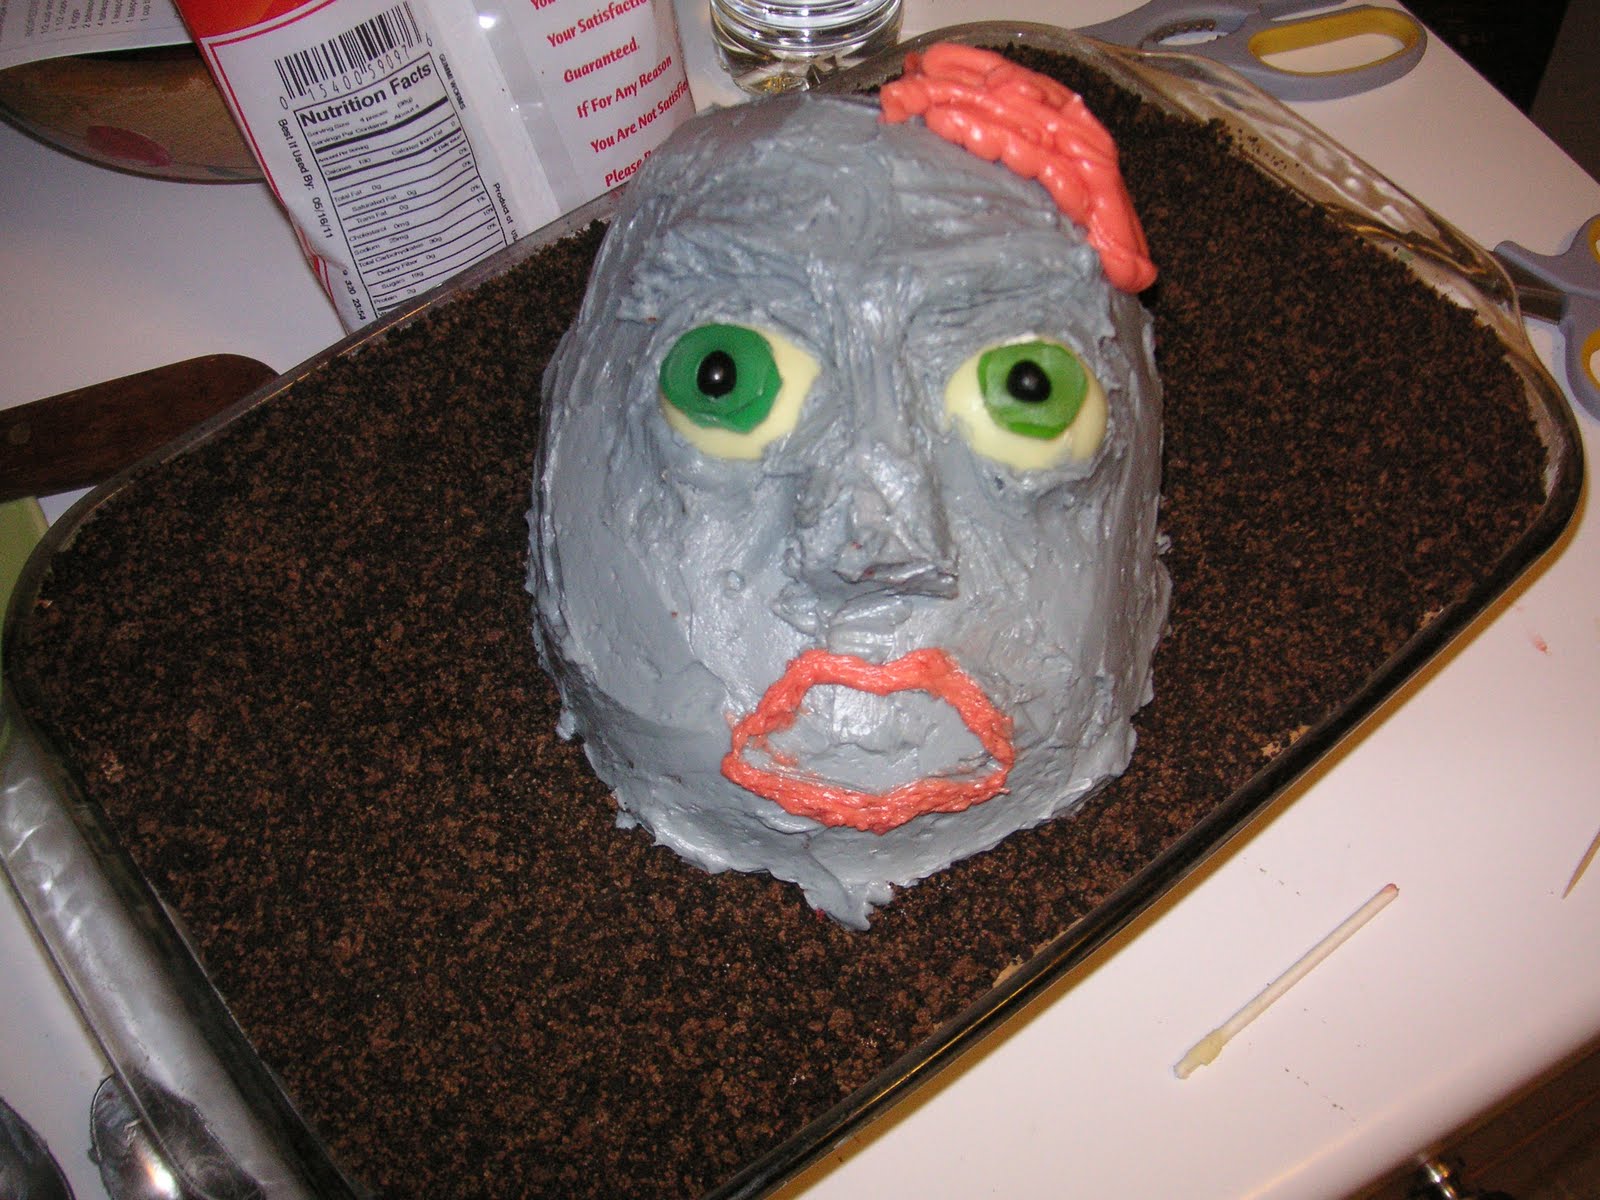
So the head was in place and I was ready to color the flesh. I took out about a half cup for the brains and colored it red, and the rest I colored a grayish blue color. I piped on the flesh at first to fill in the cracks and then used a spatula to smooth it out.
Meanwhile my sister made the eyes. She came up with the brilliant idea of using blow pops covered with white chocolate and then stuck on gummy lifesavers with half a black jelly bean in the middle. They turned out super creepy, as you can tell from the photos. We stuck those into the head and piped some more frosting around them.
After the three of us, my mom, Val and I all poked at the flesh, especially the nose, and decided it was good. Val worked on the lips. I thought she did very well. I piped on the brains and added the coconut hair, which ended up falling off into the dirt as well, and then I had to cover it with more dirt. Val came up with the brilliant idea of dropping red food coloring all over to make it super bloody looking and she also added the awesome wound to the cheek.
At the very end we added all the gummy worms coming out of his mouth and head, and also the dirt. I think the end result was pretty gruesome. J Matt was ecstatic! The best part was getting all the thumbs up from Matt and his friends. I felt like a super cool girlfriend. ;)

This was really an interesting topic and I kinda agree with what you have mentioned here! elegant cakes
ReplyDelete